


You generated a strong visual in minutes, then lost an afternoon trying to make it presentable online. Raw AI exports are often oversized, oddly cropped, or stuck on busy backgrounds that fight your layout. If your goal is to convert AI art to WebP and ship files your site can actually use, you need a short pipeline—not another all-in-one editor you will never learn. This walkthrough chains three focused tools: create an AI image generator like Vheer, isolate the subject, then compress the web.
Who This Pipeline Is For
This path fits creators who already like AI Image generation but do not want a full design stack:
- Bloggers dropping hero images into WordPress or Ghost
- Shop owners prepping product or lifestyle graphics
- Newsletter writers who need one clean visual per issue
- Marketers testing variants before a designer polishes winners
You are not learning compositing theory. You are moving a file through three clear jobs.
Three Stages at a Glance
This workflow is built around a simple three-step pipeline designed to take AI-generated visuals from raw output to fully web-ready assets.
| Stage | Purpose | Tool |
| Create | Generate or combine the base visual | Vheer.com |
| Clean | Remove backgrounds or unwanted elements | ObjectRemover.com |
| Optimize | Compress and convert the file into WebP format for web use | AnyWebP.com |
Rather than relying on a single all-in-one editor, this approach breaks the process into three focused steps: generate → clean → optimize. Each tool handles one task well, making the workflow faster, lighter, and easier to repeat at scale.
Stage 1: Generate the Base Visual on Vheer
Start at Vheer when you need fresh pixels rather than a stock photo. Text-to-image works for concepts from scratch; Multi Images to Image helps when you already have reference shots and want a single blended frame (for example a portrait plus product plus mood plate). Pick the mode that matches your brief, set aspect ratio early if you know the placement—blog hero, square social, or vertical story—and generate until you have a file worth cleaning.
Export or download the result you intend to publish. Name it clearly (`campaign-v1.png`) so later steps do not overwrite the wrong version. If you iterate prompts, save only the candidate you will actually process—folders full of “final_FINAL2.png” slow every later step.
This stage answers: “What should the picture show?”
Follow these simple steps to create images on Vheer website.
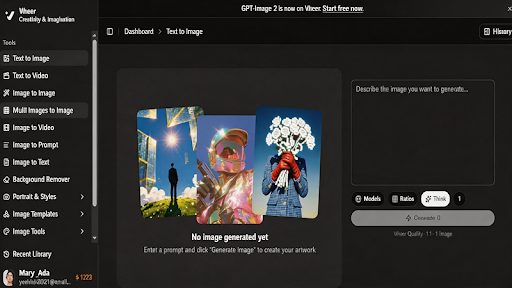
Step 1: Open the Vheer AI Image Generator
Visit the Vheer AI Image Generator directly from your browser. You can start creating images instantly without registering an account or completing any setup process. The interface is beginner-friendly and ready to use right away.
Step 2: Describe the Image You Want
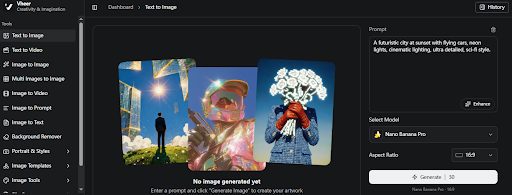
Type your idea into the prompt input area. Try to include important visual details such as the subject, art style, colors, background, camera angle, lighting, or overall atmosphere. The more descriptive your prompt is, the more accurate and visually appealing the generated image will be.
Example Prompt:
A futuristic city at sunset with flying cars, neon lights, cinematic lighting, ultra detailed, sci-fi style.
Step 3: Choose the Best Image Size
Before generating, pick an aspect ratio that matches your project needs. Vheer offers multiple layout options for different platforms and content formats.
- 1:1 – Great for profile pictures and Instagram posts
- 16:9 – Ideal for YouTube thumbnails and presentations
- 9:16 – Best for TikTok, Reels, and Shorts
- 3:4 or 2:3 – Suitable for posters, portraits, and wallpapers
Selecting the right format helps your image fit perfectly on social media or websites.
Step 4: Generate Your AI Artwork
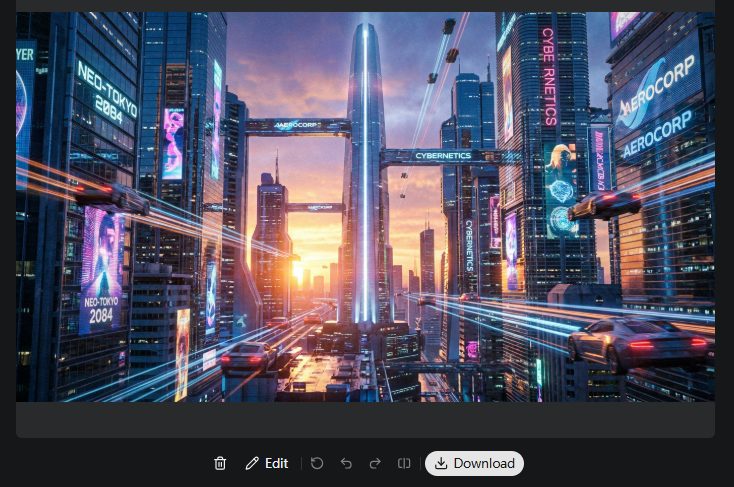
Press the Generate button to let the AI turn your text into an image. Within a few seconds, Vheer will create a unique visual based on your description. The generation process is fast, making it easy to experiment with different creative ideas.
Step 5: Save or Create More Variations
After the image appears, you can download it directly to your device if you like the result. Want something different? Simply modify your prompt or click generate again to produce new versions. You can regenerate images as many times as you want to explore different styles and compositions.
Stage 2: Clean Up with Object Remover
Open ObjectRemover website when the AI output includes clutter: busy backgrounds, stray objects, or edges that will clash with your template. Object removal is the most common fix before a graphic sits on a colored section or product grid.
Upload the Vheer export. Remove or mask what the layout does not need, then save a PNG with transparency if your theme expects cutouts. Skipping this step is fine only when the generated scene already matches your page—minimal sets, full-bleed illustrations, or deliberate environmental shots.
This stage answers: “What should viewers *not* see?”
Follow these simple steps to remove an object from the image.
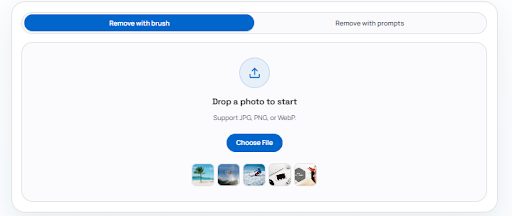
Step 1: Upload Your Image
Visit the ObjectRemover website and add the image that contains the clutter you want to remove. In this case, we take logo removal as an example. You can either drag and drop the file into the upload area or select it directly from your device.
Step 2: Highlight the Logo Area
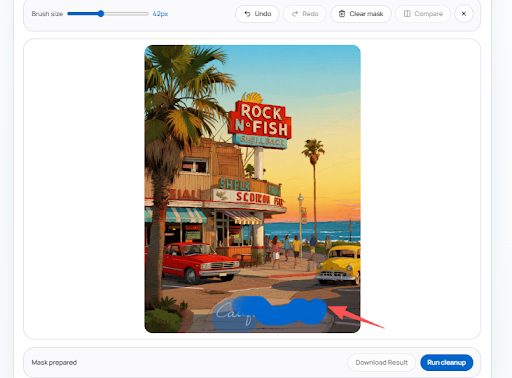
Once the image is loaded, use the brush tool to paint over the logo or watermark. If needed, adjust the brush size for more precise selection, especially when working with small or detailed logos.
Make sure the entire logo is fully covered before continuing.
Step 3: Start the AI Removal Process
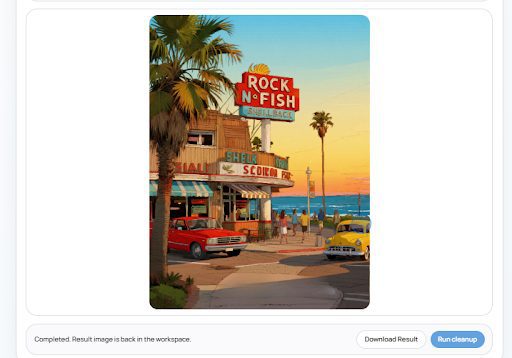
After marking the unwanted area, click the “Run Cleanup” button. The AI will automatically analyze the image and erase the selected logo while blending the background naturally.
Step 4: Preview the Clean Result
In just a few seconds, the edited image will appear. Check the result to make sure the logo has been removed smoothly. If necessary, you can repeat the process for better refinement or remove additional elements from the image.
Stage 3: Convert to WebP with AnyWebP
Finish on AnyWebP. Even a polished PNG can weigh too much; WebP often delivers smaller files with acceptable quality on modern browsers. Upload your cleaned asset, choose dimensions that match your slot (do not ship a 4000 px wide file because compression alone will not save you), and export WebP.
If analytics show visitors on older environments that resist WebP, keep a JPG fallback—but lead with WebP where your stack allows. Compare Lighthouse or your host’s performance panel once: the same visual in PNG versus WebP is often the proof that convinces stakeholders to standardize this step.
This stage answers: “Will this load fast enough?”
Follow these steps to convert the image into WebP.
How to Convert Images to WebP with AnyWebP
Step 1: Open the AnyWebP Converter
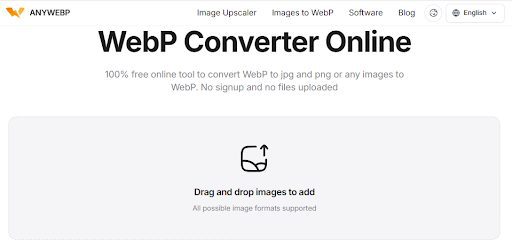
Go to the AnyWebP website and select the WebP converter using your browser. The tool works online, so there is no need to install software or create an account before getting started.
Step 2: Upload Your Image Files
Add the images you want to convert by clicking the upload area or dragging the files directly into the page. AnyWebP supports multiple formats, including JPG, PNG, GIF, BMP, TIFF, and more.
You can upload a single image or multiple files at the same time for batch conversion.
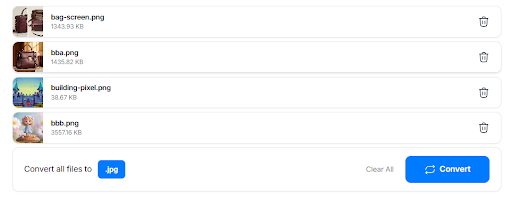
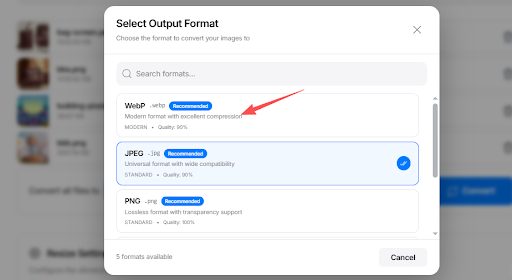
Step 3: Select WebP as the Output Format
After the upload is complete, confirm that WebP is chosen as the target image format. This ensures your files will be converted into optimized WebP images suitable for websites and faster page loading.
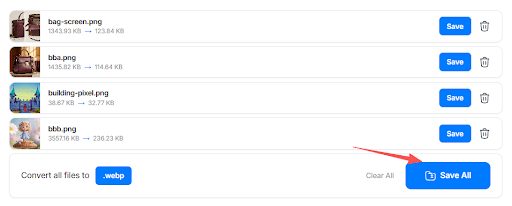
Step 4: Start the Conversion
Click the Convert or Convert All Images button to begin processing your files. The tool will quickly generate WebP versions of your uploaded images while maintaining good visual quality and reducing file size. Once done, click Save All to download all processed images.
Quality Checks Between Stages
After Vheer, zoom to 100% on faces, type, and fine lines—regenerate before you invest time in cleanup. After Object Remover, inspect hair edges and semi-transparent areas on both light and dark preview backgrounds. After AnyWebP, open the WebP in the same browser profile your readers use; compression artifacts show up differently than in desktop preview apps.
When You Can Skip a Stage
Skip Vheer when you already own the master file from a photoshoot or client pack—start at Object Remover or AnyWebP instead.
Skip Object Remover when the AI background is intentional and on-brand.
Skip AnyWebP only for temporary internal previews; public pages still benefit from modern formats and sane dimensions.
Document which stages you used in your content calendar so teammates repeat the same path.
Three Real-World Passes
Blog hero for a SaaS feature post
Generate an abstract dashboard-style visual on Vheer → remove a muddled gradient edge on Object Remover → convert image into WebP on AnyWebP for the theme header.
Marketplace thumbnail
Multi-reference merge on Vheer for product plus model → cut out for white grid background → square WebP under 200 KB for listing rules.
Newsletter banner
Text-to-image on Vheer for a seasonal motif → light cleanup if artifacts appear → wide shallow WebP to keep inbox weight low.
Questions Readers Ask
Why WebP instead of PNG for AI art?
PNG is fine for transparency-heavy masters; WebP is often better for published pages where bytes matter.
Does this replace a designer?
No. It replaces panic before launch when you need a good-enough asset tonight.
Can I run the steps in reverse?
Compressing before you remove a background rarely helps. Generate (or import) first, clean second, convert last.
Is Vheer only for one style?
Vheer supports multiple generation modes; choose the one that fits references versus pure prompts.
Putting Your AI Art on the Web
A repeatable path beats talent when deadlines are tight: create on Vheer, clean on Object Remover, convert on AnyWebP. You keep creative control in the first step and push technical debt—messy edges, heavy files—to tools built for those jobs. Run the chain once on a real post, note file sizes before and after, then reuse the same three stages whenever you need to turn fresh AI art into web-ready WebP without opening a heavyweight suite.