


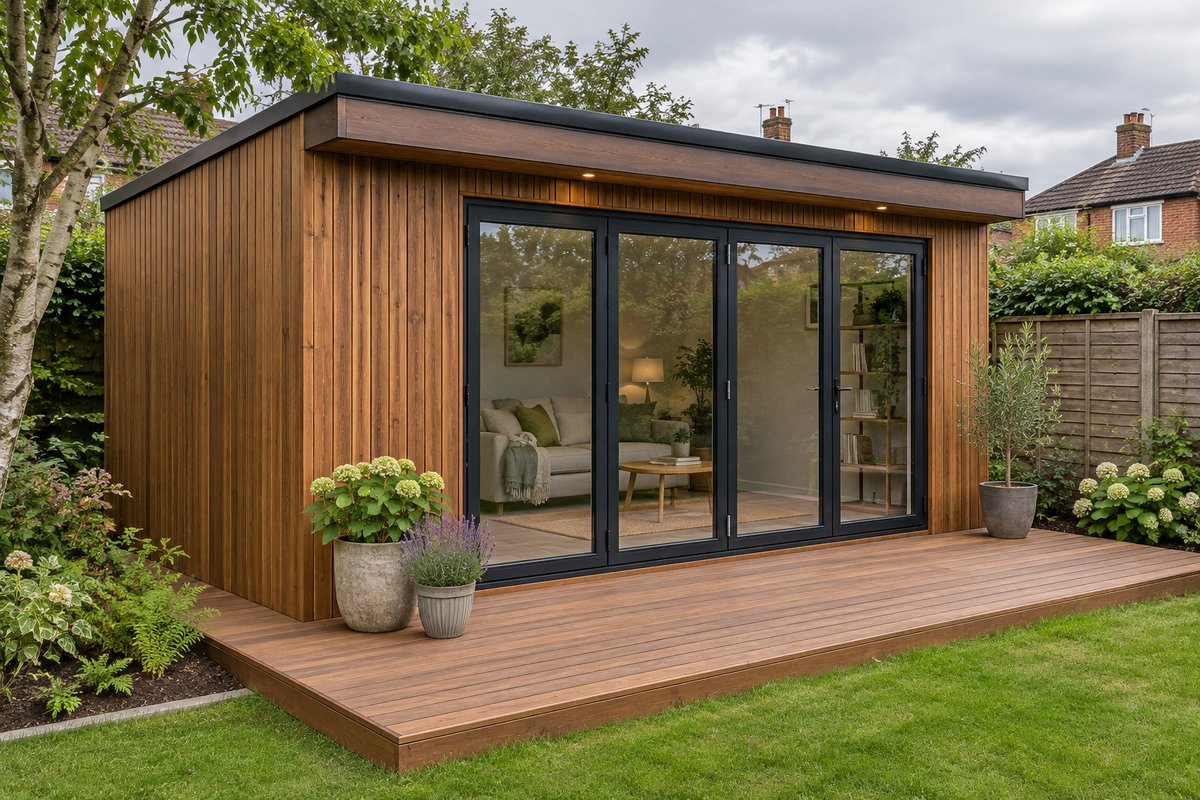
A garden room is usually sold on the inside: the desk, the bifold doors, the heating. Yet your choice of garden room cladding and decking can make all the difference to how the building looks in ten years. What goes on the walls, and what goes underfoot at the door, takes more weather than anything else on the build. Get them right and the building ages gracefully. Get them wrong, and you are re-staining, replacing warped boards or living with a blotchy grey shell long before the structure itself needs any attention.
Start with the rules, not the look
Before choosing a finish, check what you are allowed to build. In England, most garden rooms fall under permitted development if they are single storey, are not used as sleeping accommodation, and stay below 2.5 metres in height when sited within two metres of a boundary. Outbuildings also must not cover more than half of the land around the original house. Listed buildings, flats and some conservation areas face tighter rules.
Building regulations are a separate question. A detached outbuilding under 15 square metres with no sleeping accommodation is generally exempt. Between 15 and 30 square metres it is usually exempt too, provided it sits at least a metre from the boundary or is built substantially from non-combustible materials. That boundary distance matters for timber. If your garden room hugs the fence line, speak to building control before you specify a timber facade.
If you’re still deciding where to put the building, PAD Magazine’s guide to garden room planning permission in England explains how its height, position and intended use affect what you can build.
Cladding: profile matters as much as species
Most people choose cladding by colour, then discover that the profile shapes the result just as much. Shiplap and feather edge give a traditional, cottage feel. Shadow gap and double shadow profiles, where each board leaves a crisp recessed line, read as modern and architectural, which is why they dominate contemporary garden room design.
Pre-profiled exterior wall cladding panels take much of the guesswork out of this. Boards arrive machined to a consistent profile, so the shadow lines run straight across a whole elevation, and the corners and window reveals line up cleanly. For a self-builder, or a small contractor working to a tight programme, that consistency saves hours on site.
On species, three options cover most projects. Siberian larch is dense, naturally durable and weathers to a soft silver-grey, which suits rural plots and owners who are happy to let the building change colour. ThermoWood is pine or spruce that has been heat-treated to make it more stable and rot-resistant; it holds its shape well and starts life a warm, even brown. Nordic spruce is the budget choice and generally needs a coating to perform well outdoors over the long term.
Whichever you pick, fix it to a ventilated batten system with a breathable membrane behind. Air moving behind the boards is what allows timber to dry out after rain, and it does more for lifespan than any treatment.
Decking: the part that takes the punishment
Cladding is vertical and sheds water. Decking lies flat, collects leaves, sits in shade and takes daily foot traffic, so it ages faster than anything else on the plot. It is also the first thing anyone sees when they step out of the garden room.
Thermally modified boards have become a popular answer. Heat treatment changes the wood’s cell structure so it absorbs less moisture, which means less swelling, shrinking and cupping through a British winter. ThermoWood deck boards also sit comfortably beside ThermoWood cladding, so the deck and the walls weather together rather than drifting apart in colour.
A few installation details matter more than the board itself. Keep a clear air gap beneath the deck and never let joists sit in standing water. Leave a small, consistent gap between boards for drainage and seasonal movement. Pre-drill screw holes near the ends, because thermally modified timber is more brittle than untreated softwood, and use stainless steel fixings to avoid dark staining around the screw heads. If you want a cleaner surface, hidden fixing systems clip each board down from the side, so no screw heads show and there is nothing to catch bare feet.
Treat the threshold as one design decision
The best garden rooms blur the line between inside and out. Set the deck at, or just below, the internal floor level so the doors open onto a continuous surface. Where you can, run the deck boards in the same direction as the internal flooring, which makes a small room feel longer. If the cladding is dark, a lighter deck stops the building feeling heavy; if the cladding is pale, a deck in the same timber gives a calm, unified look.
Where to Spend on Garden Room Cladding and Decking
It is tempting to economise on the exterior because it feels like a finishing touch. In practice, garden room cladding and decking take the brunt of the weather and can be disruptive to replace once the room is fitted out and in use. Put the budget into durable timber, proper ventilation and good fixings. Interior finishes are easy to upgrade later; a failing facade is not.
A garden room that is well clad and well decked needs little more than an annual wash and a check of its fixings. One that is not will demand constant attention, and that is time you built it to enjoy.

