


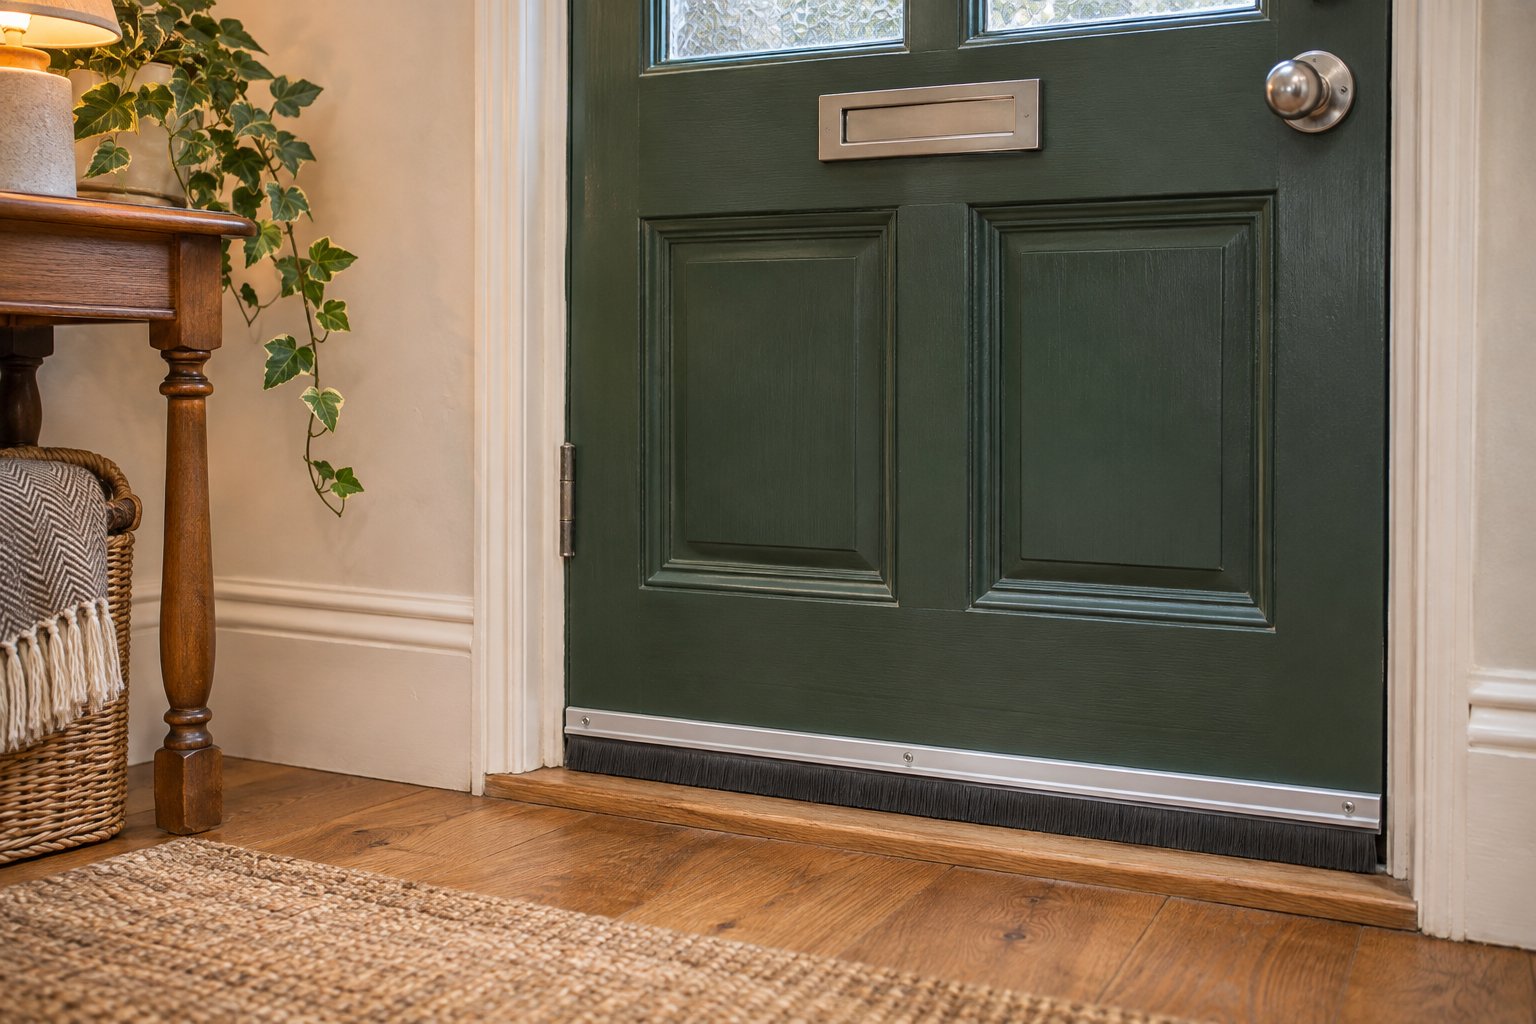
Learning how to draught-proof a front door starts with finding exactly where cold air enters. Gaps beneath the door, worn perimeter seals and poorly closing letterboxes can leave a hallway uncomfortable, even when the heating is on. Identifying the opening helps you choose a suitable repair before spending money on a replacement door.
For many external doors, the options include a bottom brush or flap, compatible strips around the edges, and a letterbox cover. However, every fitting must suit the door and its measured gaps. Once the work is complete, the door should still open, close and lock normally, with designed ventilation left unobstructed.
How to Draught-Proof a Front Door: Start With the Gaps
Before buying a draught excluder, inspect the closed door from inside the hallway. Look for daylight around its edges and beneath the threshold. On a windy day, feel for moving air around the frame, letterbox and keyhole. Whistling or rattling can also help you locate an opening.
Write down precisely where the problem occurs. For example, “cold air beneath the latch side” gives a supplier more useful information than simply describing the whole door as draughty.
Check how the door operates, too. Does it rub against the frame? Do you need to lift the handle or push hard to lock it? Record these issues before fitting a seal, because adding material will not necessarily correct an existing alignment problem.
If several rooms remain uncomfortable, read PAD’s guide to why a house stays cold even with the heating on. The source of the problem may extend beyond the front entrance.
Choose the Right Front Door Draught Excluder
Different openings need different fittings. Use your inspection notes and measurements to narrow the choice.
| Where cold air enters | Option to investigate | What to check |
|---|---|---|
| Beneath the door | Bottom brush or hinged flap | Gap size, threshold and opening clearance |
| Around the opening edges | Compatible foam, brush or wiper strip | Product gap range and normal door closure |
| Through the letterbox | Correctly sized brush or flap | Opening dimensions and free movement of post |
| Through a traditional keyhole | Purpose-made keyhole cover | Compatibility with the existing lock |
The Energy Saving Trust’s draught-proofing guidance identifies these four areas as useful starting points for external doors. energysavingtrust.org.uk
You do not need to purchase every fitting at once. Address the confirmed openings, then check whether a draught remains.
How to Draught-Proof a Front Door at the Bottom
The gap beneath an external door is worth checking carefully when cold air moves across the hallway floor.
Measure the door’s width and the space underneath at several points. An older door or uneven threshold may have a different gap at each end. Also watch the door as it opens to establish how much clearance is available.
Select a Suitable Bottom Seal
A brush strip or hinged flap may be appropriate, depending on the door and threshold. Historic England notes that brush-type wiper seals can work at door bases even where some warping is present. Its advice on draught-proofing older buildings explains why retaining an original door is often worthwhile. historicengland.org.uk
Before ordering, check the product’s suitability for:
- The door material.
- The measured gap.
- The opening direction.
- The threshold surface.
- The clearance needed as the door moves.
Follow the manufacturer’s fitting instructions. Avoid assuming that a product will work simply because it matches the door’s width.
Test the Door After Fitting
Open and close the door through its full movement. Make sure the new fitting does not catch on a mat, scrape excessively or obstruct access.
Next, test the latch and lock. If either needs more force than before, review the fitting rather than pushing the door harder.
How to Seal Draughts Around the Door Frame
Perimeter strips should fill unwanted gaps while allowing normal operation. A thicker strip is not automatically more effective: it can prevent the door from closing properly.
The Centre for Sustainable Energy recommends trying a short section of foam excluder before fitting the full length. Its DIY draught-proofing guide also advises cleaning and drying the frame so the adhesive can stick. www.cse.org.uk
For a compatible self-adhesive strip:
- Compare its stated gap range with your measurements.
- Prepare the surface according to the product instructions.
- Fit a short test section.
- Check that the door closes, latches and locks normally.
- Complete the remaining lengths only when the test works.
- Repeat the operational checks.
Check the hinge side as well as the top and latch side. Record any remaining airflow so you can distinguish an unresolved opening from a newly fitted seal.
What If the Door Already Has Seals?
Photograph the existing seals and look for the door’s make, model or installation paperwork. Ask the supplier to identify compatible replacement parts before adding another layer.
Explain any difficulty closing or locking the door at the same time. This helps the person assessing it consider the seal and the door’s operation together.
Stop Draughts Through the Letterbox and Keyhole
Even when the perimeter fits well, cold air may enter through separate door fittings.
Check whether the letterbox flap returns to its closed position after post passes through. Measure the opening before choosing an additional brush or flap, and make sure the proposed fitting allows letters to pass freely.
A traditional open keyhole may suit a purpose-made cover. Confirm compatibility with the lock before buying, especially where the door has modern hardware or a specialist security system.
When deciding how to draught-proof a front door, treat these small openings separately from the frame. Rechecking each area after a repair makes it easier to identify what still needs attention.
Reduce Front Door Draughts Without Blocking Ventilation
Draught-proofing must leave the home’s designed ventilation functioning correctly.
Keep air bricks, boiler flues and window trickle vents unobstructed. Do not automatically seal gaps beneath internal doors, because these may form part of the airflow route between rooms. Follow the instructions for any installed ventilation system. energysavingtrust.org.uk
If you cannot identify the purpose of an opening, seek advice before covering it.
Recurring moisture also deserves investigation. PAD’s guide to dehumidifiers and opening windows in winter explains how moisture removal and fresh-air ventilation serve different purposes.
Draught-Proofing Older Doors, Fire Doors and Rented Homes
The right approach depends on the door’s construction, condition and role within the property.
Older Timber Doors
Seek advice about repair before assuming an older timber door needs replacing. Historic England supports retaining original doors where possible and describes draught-proofing as a relatively unobtrusive improvement. historicengland.org.uk
Ask the person assessing it to explain which defects need attention and how the proposed work will preserve normal operation.
Fire Doors and Doors With Heritage Value
Historic Environment Scotland’s guidance on saving energy in traditional buildings notes that draught-proofing may be unsuitable for fire doors or doors of special heritage value. Obtain specialist advice before altering either. www.historicenvironment.scot
Rented Properties
If you rent, contact your landlord or managing agent before drilling, cutting or changing fittings.
Include photographs and describe the exact location of the draught. Mention whether the door catches, leaves visible gaps or needs lifting to lock. These observations give a clearer basis for a repair assessment than a general report of a cold hallway.
Your Front Door Draught-Proofing Checklist
After completing the work, repeat the airflow inspection in similar windy conditions. Check the repaired openings and note anything that still needs attention.
Before finishing, confirm that:
- The door opens freely.
- It closes and latches normally.
- The lock operates without extra force.
- New fittings remain securely positioned.
- Post passes through the letterbox.
- Designed ventilation remains clear.
Keep product details and photographs with your maintenance records. For other seasonal checks, use PAD’s UK winter home maintenance checklist.
Frequently Asked Questions
How do I draught-proof a front door?
Identify where air enters, measure the opening and select a compatible fitting. Depending on the problem, this could involve a bottom brush, perimeter strip, letterbox flap or keyhole cover. Check normal door operation after every change.
Why will my door not close after fitting a draught strip?
The strip may be too thick or incorrectly positioned. Review its sizing and fitting instructions instead of forcing the door closed.
Does a draught mean I need a new front door?
No. Ask whether a suitable seal or repair can address the identified opening before considering replacement.
Can I block vents to keep the hallway warmer?
Keep designed ventilation unobstructed. Investigate unwanted gaps while allowing the home’s ventilation system to function.
What should I check before buying a bottom draught excluder?
Measure the door width and gap at several points. Check the threshold, opening direction and available clearance, then compare those details with the product instructions.

